Are you wondering about how to make a whiteboard magnetic? Magnetic whiteboards are a great way to study, play or can be used just as a fun décor. They have a wide range of uses from home to workplace to classrooms. These boards are fully erasable and can be used to draw diagrams or other markings. They can be made on a budget and are customizable for all sorts of considerations such as wall or room size, aesthetic and utility. Magnetic boards are a distinguished organizational tool that is great for keeping appointments and notes which are visible and easily accessible. They can be conveniently hung anywhere including the kitchen, play, room, craft room, kid’s room, and family room or even in a garage. Since they are magnetic, they can be utilized to support magnets similarly like any other metal surface. Moreover, they are not that difficult to make and only a few economical materials are required for this purpose. There are many ways in which you can make a whiteboard magnetic. Let us take a look at some of these.
Magnetic Whiteboard Paint

Magnetic dry erase paint is made by many different paint manufacturers. This dry erase paint convert flat materials or walls of all sizes into spaces that are magnetic dry erase. These areas can then be used more creatively and practically as magnetic whiteboards. You can ask your local store about this paint if you are in any doubt. This fun concept of using dry erase paint and fabric is a substantial alternative for a corkboard. You can say goodbye to cork boards and welcome magnetic boards with no more worry about pins getting lost on the floor.
Magnetic Metal Board
You can use metal as a magnetic whiteboard. For this, you need to buy a metal sheet that is thin and durable, and the size of your choice. If you are looking for something magnetic in nature you should go for galvanized steel. You can use a wooden sheet similar in size as the metal sheet to strengthen the board which will also make it easier to move about and hang up. Cork can be used as a back to the board since it is soft and lightweight, however, plywood or something similar can also be used. If you plan to paint the metal with some color other than white you should spray the metal with a rust-resistant latex primer. Next, you can color the metal white using whiteboard paint by a foam roller smoothly. After that, you can glue the painted metal to the wooden backing using epoxy, polyurethane-based super glue or silicone construction adhesive that hold your magnetic whiteboard together. Just wait for 72 hours for the paint and glue to dry and your magnetic whiteboard is ready for use.
Making a whiteboard magnetic can be time-consuming and costly at times. You can also buy magnetic boards directly that are much better and cheaper. In this way, you can skip this whole process of constructing a whiteboard into a magnetic. Here are some of the inexpensive magnetic boards that can be purchased easily.
Officeline Ultra-Slim, Lightweight Magnetic Dry Erase Board
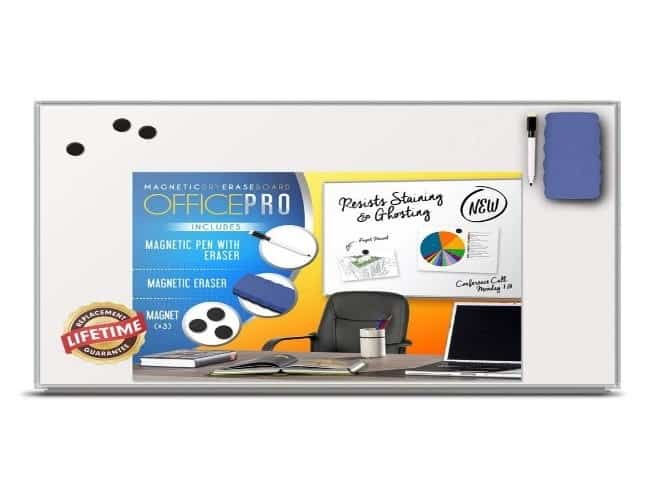
This Ultra-Slim and lightweight Officeline Dry Erase board is magnetic and comes with accessories that include pen, pen tray, 3 magnets, and eraser. It is one of the top-rated boards that serve its purpose efficiently. This scratch-resistant magnetic board is sold as a package that comes with an easy hang mounting kit which helps to hang this magnetic dry erase board on the wall. You can write over and over again on this magnetic board with its clarity being maintained because of its scratch-resistant feature. Since this board is Ultra-Slim, it can conveniently fit in any space of your office.
Luxor Mobile Dry Erase Double-Sided Magnetic Whiteboard
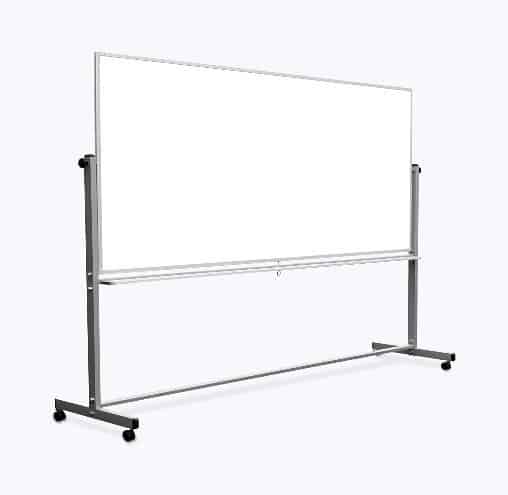
The Luxor Mobile Double-Sided Magnetic Whiteboard offers double the writing space due to its easily flip reversible double-sided board and provides the necessary mobility needed. It is 96” W and 40” H and comes with a 1 ” aluminum frame and stand. The frame features side knobs and locking brakes that steady the frame while writing or presenting making it ideal in the professional space. This traditionally shaped magnetic board is well suited for any business or school. It consists of magnetic surfaces that allow users to display posters or papers. With its full-length eraser/ marker tray, it provides ample room for materials required for a magnetic whiteboard.
Luxor Reversible Magnetic Mobile Whiteboard
The Luxor Reversible Magnetic Mobile Whiteboard is one of the most highly recommended magnetic boards. This magnetic board is lightweight and portable which offers 360 degrees of movement. It comes with a smooth magnetic surface which allows you to write easily and erase after use. It offers an aluminum frame along with a detachable aluminum tray for markers. This double-sided magnetic whiteboard is painless to flip and convenient to assemble and comes along with all the essential assembly tools. The Luxor Magnetic Whiteboard has a scratch-resistant surface and consists of wheels for mobility along with four caster brakes. This board is a worth buying product that fits nicely with all the modern commercial environment.
VIZ-PRO Double-Sided Magnetic Mobile Whiteboard
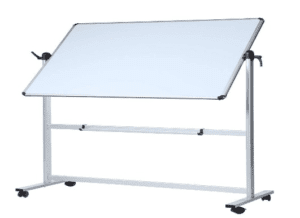
VIZ-PRO Double-Sided Magnetic Mobile Whiteboard is one of the outstanding magnetic boards. This board is highly durable with a smooth surface and is made from high-quality material. It consists of a detachable marker tray, a stand with freely movable casters, a rotary handle and wheels for movement. Its writing surface measures around 48 x 36 inches. This double-sided board is 360 degrees rotatable and can be locked at any position which makes it an ideal option for classrooms, offices, homes, and schools. This Double-Sided Magnetic Mobile Whiteboard is undemanding to flip and convenient to assemble with all the necessary assembly accessories included in the package. This magnetic board comes with an appealing price tag and provides a pretty decent value for your money. Hence this product is worth buying.
FAQs
Can you make an existing whiteboard magnetic?
Yes, it is possible to make an existing whiteboard magnetic. Non-magnetic whiteboards are made of materials like melamine, laminate, and clear/frosted/back-painted glass and do not have any steel backing. You can magnetize your existing whiteboard using a compatible magnetic whiteboard paint – also known as magnetic dry-erase paint. It is usually compatible with materials like glass, Masonite, wood, latex, metal, and other smooth surfaces, so you can apply it on most glass and Masonite whiteboards to make them magnetic. You will need around 3 coats of magnetic paint and 3 coats of primer followed by a final coat of whiteboard paint to get the best results. Depending on the magnetic strength you are aiming for, you might have to increase the number of magnetic and primer coatings accordingly. It is important to do some prep work on the existing whiteboard to make sure that its surface is smooth and clean. Otherwise, surface imperfections can limit the magnetic effect you are trying to achieve.
A simpler DIY hack would be to use adhesive magnetic strips, sheets, and tapes that you can stick to the old whiteboard – preferably on the sides or around the frame where you can use magnets to hold photos, notices, drawings, lists, etc., leaving the main whiteboard space available for writing. Both magnetic paints and stationery help with revamping traditional whiteboards for multifunctional, visual, and creative presentations, allowing you to use more materials apart from the basic text.
How do they make whiteboards magnetic?
Magnetic whiteboards have a steel sheet backing to enhance their magnetic properties. The main writing surface material is usually porcelain, painted steel, or back-painted tempered glass that is laminated to a steel backing. Steel is a popular choice for whiteboard backing sheets because it contains iron, and magnets attract ferromagnetic materials like iron, making this a key difference between magnetic and non-magnetic whiteboards.
In this way, manufacturers create whiteboards that are both erasable and magnetic, and these are much heavier than normal whiteboards because of the added magnetic treatments.
If you want to make your own DIY magnetic whiteboard from scratch, you can start with a sheet of galvanized steel attached securely to a wooden backing for support. You can use a primer to prep the steel surface before rolling a whiteboard paint on top. Once the backing super glue and paint have dried completely (which might take 72 hours or more), your DIY magnetic whiteboard will be ready to use.
How can you make a surface magnetic?
There are different ways to magnetize a surface. You can use a magnetic paint or primer like the Rust-Oleum® Specialty Magnetic Primer on smooth and flat surfaces like doors, glass, walls, desk sides, cabinet sides, etc. to make them magnetic. These paints are compatible with most surfaces including wood, metal, plaster, and masonry, so you can get creative with the way you use these areas for décor or functionality. Apply at least 3-5 coats of your magnetic paint/primer if you want to top it with whiteboard paint, chalkboard paint, or simple paint colors for aesthetics.
The benefit of using magnetic paints to turn basic surfaces magnetic is that no drilling or installations are involved, so the process is very seamless and DIY-friendly. Another excellent DIY-friendly option is to use magnetic wallpapers. They come in different colors and designs and can instantly turn your wall surfaces magnetic for multiple uses. Most of these magnetic wallpapers have a primed finish, so you can always paint over them if you want to customize the colors.
How do you make a magnetic whiteboard wall?
You can use a magnetic whiteboard or dry-erase paint to make your wall both magnetic and erasable. Check for compatibility with your wall material to make sure that the paint will work as expected, and do not forget to prep your wall by filling holes and cracks and cleaning the surface. It is recommended to apply around 3 coats of magnetic paint followed by another 3 coats of primer before topping it all with the whiteboard paint. This will help you create a sealed and finished wall surface that is smooth to use just like a standard whiteboard. The higher the number of magnetic paint coats, the stronger the magnetic effect. Smart Magnetic Paint by Smarter Surfaces is a popular choice among DIY users.
Always read the instructions on the product to make sure you follow the correct application methods, drying intervals, and the number of coats depending on the brand you choose.
Smarter Surfaces also offers other thoughtful products that you can use to turn your wall into a magnetic whiteboard – especially if you do not prefer working with paint. The Smart Magnetic Whiteboard Wallpaper is a clever alternative. It comes pre-primed with a white, glossy finish that is ready to be used for both writing and showcasing your creative materials. Another relevant product is the Smart Magnetic Plaster that you can use along with whiteboard paints or whiteboard wallpapers for maximum efficiency. The plaster adds the magnetic element, whereas the paint or wallpaper creates the whiteboard/erasable effect. This magnetic plaster is more powerful than its paint or wallpaper counterparts. It helps to make your wall more magnetically receptive, as a wallpaper alone will not be sufficient to hold heavier materials.
Can I paint something to make it magnetic?
Yes, you can use magnetic paint or primer to turn a surface magnetic. The magnetic strength will increase according to the number of coats you apply, so read the instructions carefully, especially if you plan to add a color paint on top (you do not want to buffer the magnetic effect with a heavier color coat). Such magnetic paints are mixed with iron dust so that when you paint something with them, its surface attracts magnets. Make sure to prep the surface first to make it smooth and sealed. You might need to use a primer to prep the area. Magnetic paints from different brands are compatible with different materials like wood, glass, metal, or Masonite, so check for surface compatibility before buying the product.
How do you make something permanent on a whiteboard?
Permanent markers like Sharpies can be used to write or draw something permanent on a whiteboard. The text, lines, or drawings will stay fresh for a long time, assuming that no one overwrites using a board marker or wipes it clean using alcohol. Paint can also be used for creating longer-lasting marks, but it comes with the major drawback of chipping and fading away over time. If you do want to preserve your writing or drawing, use a Sharpie, and then apply spray-on enamel to protect the markings and make them last longer. You can also cover the whiteboard with a glass frame to preserve the text/markings, as this will prevent exposure to air, dust, moisture, and other elements that eat away the ink or paint.
Look for fixative sprays that can work on whiteboard materials – some fixative sprays are compatible with glass, so if you have a glass whiteboard, you might get lucky.
Be careful while using spray products in this way, as the risk of damaging the ink or paint is high if the chemicals do not match, so always test a sample area first.
If you want to create permanent board lines – especially for repetitive academic purposes – consider using pinstripe, electrical, or washi tapes. Pinstripe tapes come in different shapes, sizes, and designs to help you customize your whiteboard lines, and they are more effective than using permanent marker lines that will need to be re-traced more often to stay visible.
How do you make a cheap magnetic board?
To make your own DIY magnetic board on a budget, you can use supplies that you already have at home – with the exception of a galvanized steel sheet that you might need to buy. You will need a photo frame to work as a backed casing for your galvanized steel, so make sure that you get the right sheet size that fits the frame. You can use the cardboard backing as your sizing template for the steel sheet. Spray paint, whiteboard paint, and chalkboard paint are optional add-ons you can choose for aesthetic purposes – the framed steel sheet will work perfectly well on its own as a magnetic board. Start by sanding down and cleaning the steel sheet before priming and painting it (if needed). Once it has dried completely, assemble your photo frame and painted steel sheet together like you would with a printed photo – and you have a cheap magnetic board ready to use!
Alternatively, you can use baking trays or any steel trays as magnetic boards that can be drilled into walls or any flat surfaces. You can also buy adhesive magnetic sheets that will stick to a flat board or tray to get the same result if you do not have steel trays around. All of these options will help you create cheap magnetic boards by repurposing items you already have at home – which saves the need to pay for magnetic paint.
What are whiteboard magnets made of?
In general, whiteboard magnets are made of neodymium, iron, and boron. They are also known as neo magnets or rare-earth magnets (taking after the rare-earth metal neodymium). These are very powerful, permanent magnets designed for various magnetic whiteboard materials including glass. In fact, only neo magnets work on magnetic glass whiteboards as they have a magnetic field strong enough to overcome the thickness of tempered glass.
Porcelain whiteboards, on the other hand, can work with any type of magnets. Some neodymium magnets are plated with protective coatings, so this can interfere with the magnetic compatibility of glass whiteboards. Make sure to buy compatible magnets that suit your whiteboard’s material.
How to stick things to a non-magnetic whiteboard?
There are several creative, outside-the-box ideas you can use to stick different materials to your non-magnetic whiteboard – and they all harness the power of adhesive stationery! Adhesive magnetic tapes, strips, or sheets make resourceful tools for revamping your traditional whiteboard. You can stick their adhesive end on the board and use the magnetic surface to attach papers, photos, cards, etc. using magnets. Similarly, you can use double-sided tapes to stick long-term materials like labels and borders – make sure to keep things light with double-sided tapes!
Another creative idea is to stick adhesive corkboard strips to your whiteboard and use thumbtacks to hold papers or cards. Dry-erase adhesive and removable stickers are excellent tools for customizing your whiteboard’s display potential. They are peel-and-stick notes that you can write on and erase for multiple reuses, which comes in handy for updating reminders without using new stationery. Instead of writing on new sheets that need to go on the board, you can simply allocate one side of your whiteboard to these erasable stickers and update them easily.


